My previous blogs have been “softer” topics such as encouraging self service in your organisation. I’m excited today to have a more technical blog post to share.
This post is about automatically distributing Power BI reports to end users in PDF through Power Automate. Firstly, I would say that I am not a massive fan of this practice. I would much rather encourage people into the Power BI service (or Power BI mobile app) to consume the report in an interactive mode. However, we have all worked in organisations where senior leaders just want to open a static PDF view of data on a regular cadence. This requirement is probably not going anywhere, so I hope this blog helps people to make the process as automated as possible.
What was the status quo before I implemented the change I’m about to describe?
- A Power Automate job was set to run daily at 9am EST (2pm UK time) to send out a PDF version of a Power BI report to an executive audience.
- The dataset that the report runs from is updated daily.
- The dataset refresh is automatically triggered when the underlying database is updated.
- The jobs which update the underlying database usually finish by about 6am EST (11am UK time) – but we have seen delays of up to 8 hours whilst data engineers resolve issues.
- Myself and my team were manually checking the report had refreshed before the 9am job ran. About 20% of the time, the database refresh has not happened (for various reasons) and we have to turn off the Power Automate job which distributes the report and then manually run it after the refresh has happened.
What did I want to change?
I wanted the Power Automate job which distributes the report to only be triggered after the dataset has been refreshed. In other words – the report would not be distributed automatically until AFTER the dataset refresh has successfully completed.
Making the change
Starting Point
I initially expected this to be easy! I went to the Power Automate jobs (which were built by a colleague) and expected to be able to find an automated trigger in Power Automate based on successful refresh of a dataset. Perhaps someone will now tell me that such a trigger does exist (I would appreciate this!!), but from my online research it doesn’t appear to be the case. I will raise an idea on this to Microsoft because it would certainly make this process easier.

Solution Summary
The solution in summary is below:
- Get the dataset refresh history to check the dataset has been refreshed: For this, I use the Custom Connector for the Power BI Rest API. Massive credit here to Miguel Escobar and Jordan Kline who created this connector. You can find more details here in Miguel’s blog.
- Build a Power BI report with a visual containing a measure which checks:
- Has the dataset refreshed today?
- Is it after 2pm? (more on this later)
- Publish the new dataset/report with this measure in it on the Power BI service.
- Pin the visual containing the measure to a dashboard. Set up a data alert.
- Use the data alert to trigger the Power Automate job to distribute the report!
Solution in Depth – 1/5
Get the dataset refresh history to check the dataset has been refreshed
Custom Connector for the Power BI API: For a couple of years now, I’ve been using Miguel Escobar and Jordan Kline’s custom connector for Power BI Desktop to the Power BI Rest API. Miguel and Jordan’s documentation (blog and Github Repo) explain it best, but in summary, it allows you to look at the Power BI log data. You can see workspaces, reports, datasets, users, etc and when certain actions have been taken. You see all this data for all Power BI artifacts that you have access to (everything if you are a Power BI Admin) and you can import this data into Power BI desktop. I’ve used it to create report inventories in a migration previously – and it’s a great way to just check what is “out there” as a Power BI admin.
This time I’m using it for a very specific requirement – to check precisely when a specific Power BI dataset was last refreshed.
Once you have the custom connector working (the connector instructions cover all this, so I won’t repeat it here (let me know if you get stuck and I’ll help!)) then you can start connecting to the API.
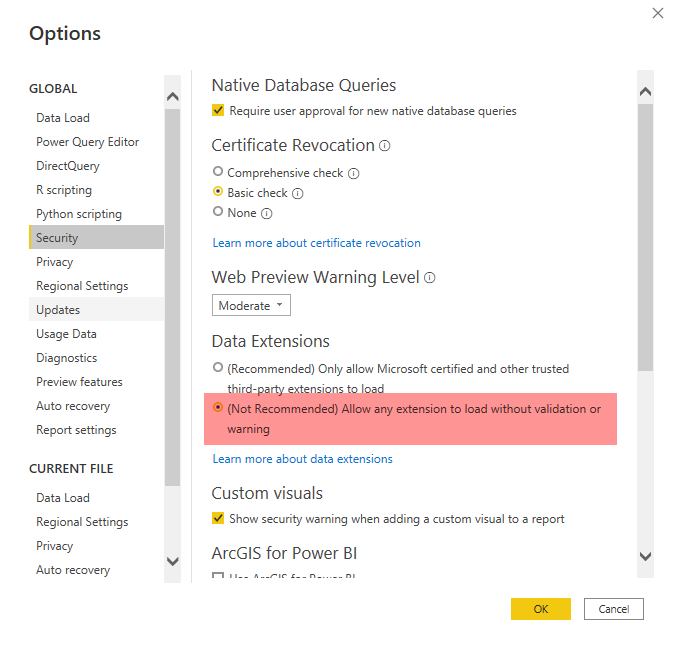
Once you’ve installed the connector, you need to have enabled custom connectors in Power BI Desktop Options and Settings):
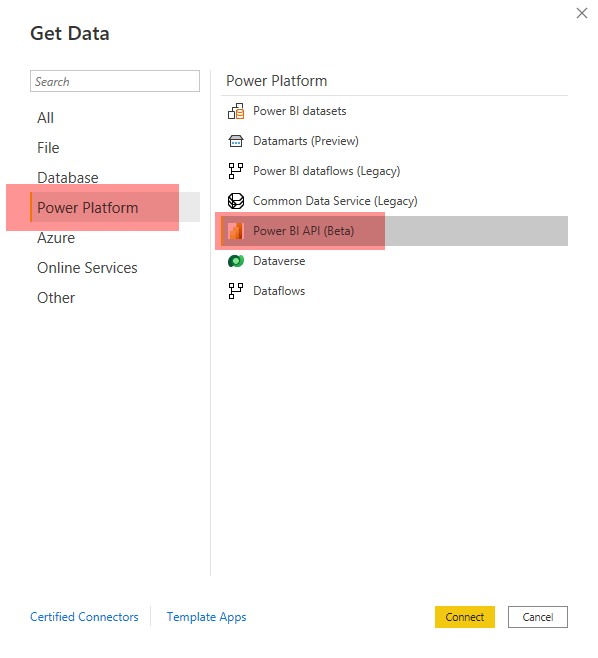
Once you’ve done this, you can open the “get data” dialogue in Power BI and you will find the connector here:
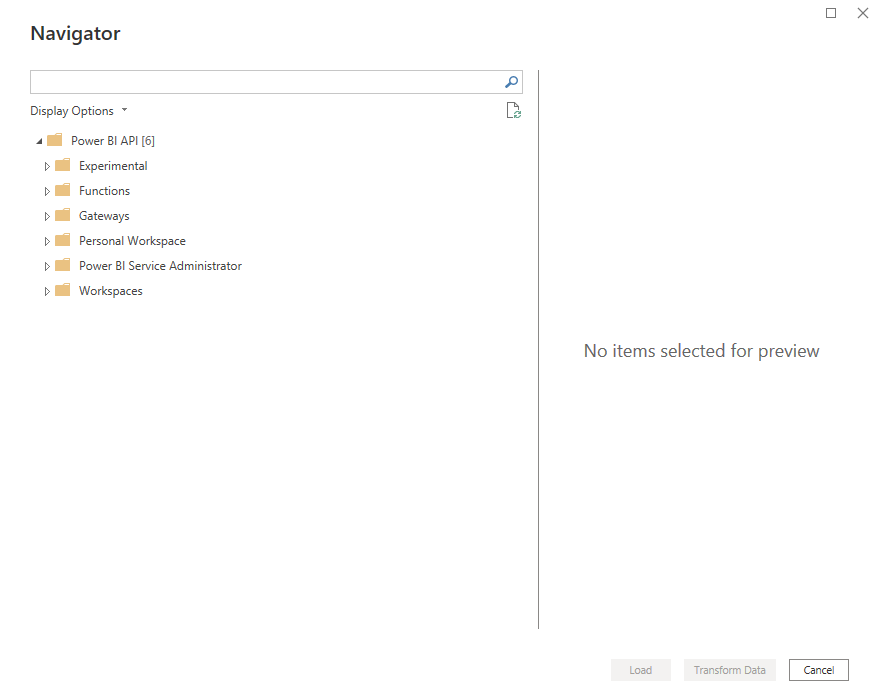
The connector then presents you with the following options:
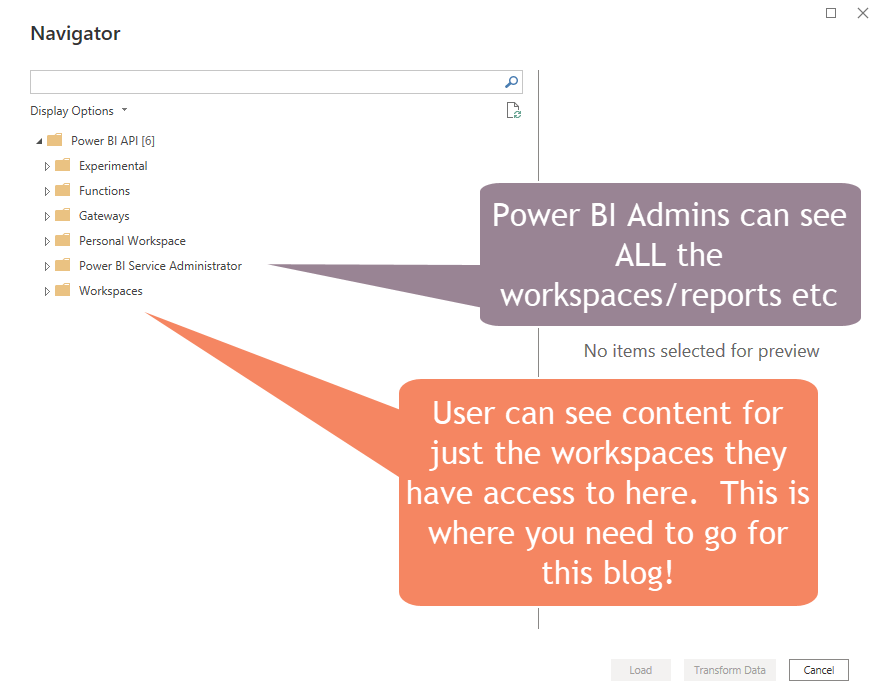
Note: The Power BI Service Administrator option does not include the “Refresh History” data. (Credit for this note to Jordan Kline who gave me this additional info after reading the blog!).
Open up the Workspaces folder, and tick the “refresh history” item. You may want to also tick the “Workspaces” and “Datasets” queries as well as these will carry descriptive fields like “Name” which can be used to find the Dataset ID.
You need the dataset ID to be able to search for the refresh history for the Dataset that you are looking to use for your automatic report distribution.
You can get it from the “Datasets” table, using the dataset name (if you know it!)

If you don’t know the dataset name, you can start at the “Workspaces” table and use the Workspace name to find the Workspace ID, and then search the “Datasets” table “using Workspace ID”.
Another way of finding the dataset name is simply to open the Workspace in Power BI:
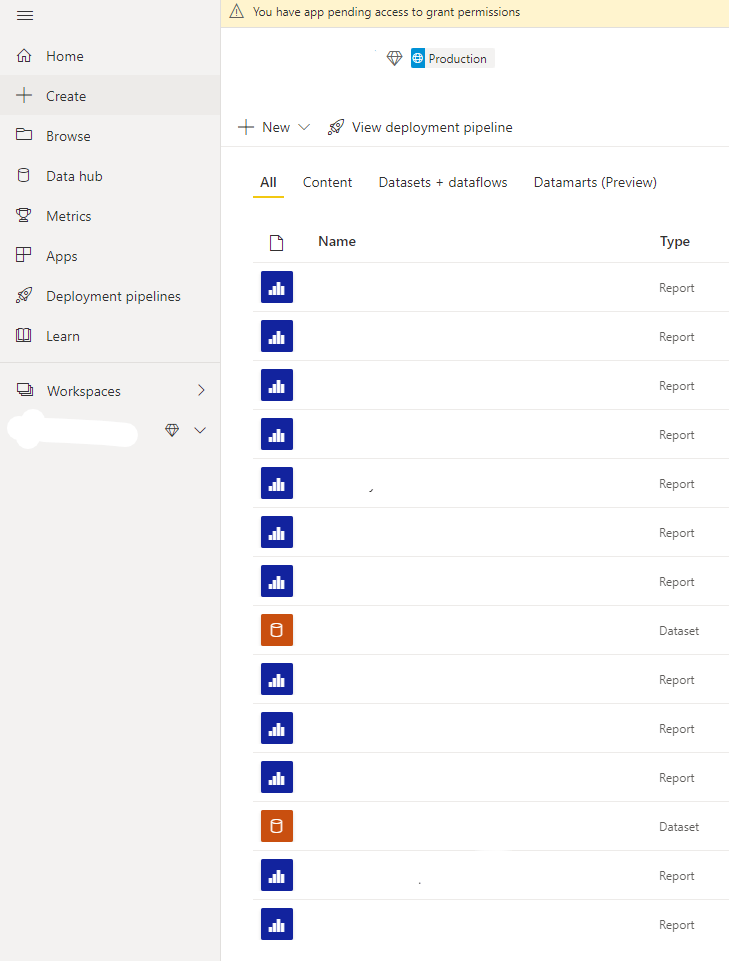
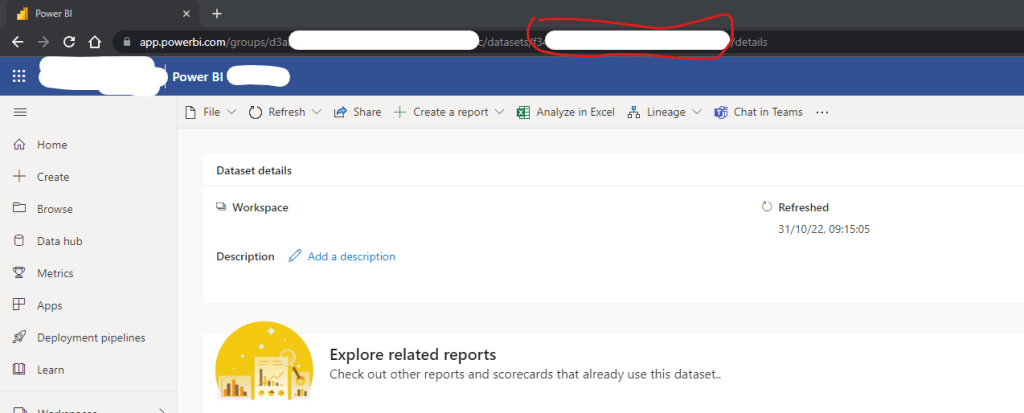
And then click on the Dataset Name – the area of the URL in the red ring is the Dataset ID:
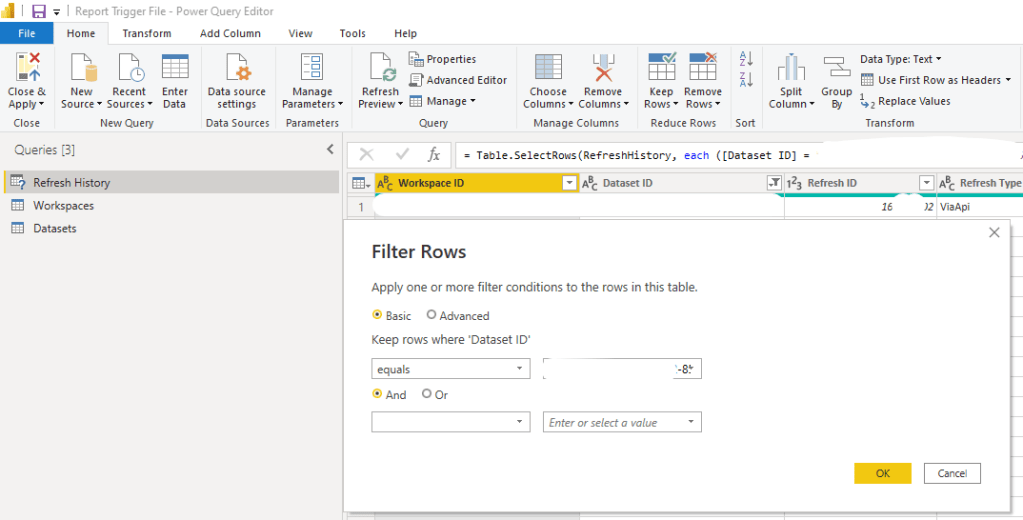
Once you have the dataset ID, you can then filter the refresh history in Power Query to just that dataset you want.
Whilst in Power Query, I also created a new column (using “Add Column -> Date Only”) which helped to simplify the DAX later on.
![Shows the create custom column dialogue box and the formula which is "= DateTime.Date([End Time])](https://robhawkerdata.com/wp-content/uploads/2022/10/image-9.png?w=713)
Here’s the M code for the whole query as an accelerator for anyone reading this:
let
Source = PowerBIRESTAPI.Navigation(),
AppWorkspace = Source{[Key="AppWorkspace"]}[Data],
RefreshHistory = AppWorkspace{[Key="RefreshHistory"]}[Data],
#"Filtered Rows" = Table.SelectRows(RefreshHistory, each ([Dataset ID] = "DATASETID")),
#"Inserted Date" = Table.AddColumn(#"Filtered Rows", "Date", each DateTime.Date([End Time]), type date),
#"Renamed Columns" = Table.RenameColumns(#"Inserted Date",{{"Date", "End-DateOnly"}})
in
#"Renamed Columns"
You just need to replace the string “DATASETID” above with the Power BI Dataset ID.
Once you have the “refresh history” ready you can load it to Power BI.
Solution in Depth – 2/5
Build a Power BI Report with a Visual Containing a Measure to Check Refresh Status
Once the refresh history data is loaded into Power BI, you can then create a Measure which will be used to evaluate whether the report is ready to distribute yet:
Here is the DAX that I used:
ReportDistributionTrigger =
--Calculates the latest refresh date on our dataset.
VAR LastRefreshDate =
    CALCULATE(MAX('Refresh History'[End-DateOnly]))

--Compares the refresh date to today to see if it already happened today.
VAR TodayvsLastRefreshDate=
   IF(LastRefreshDate=TODAY(),
      1,0
    )

-- Provides a string which gives the time of today at 2pm (2pm is 14,0,0).
VAR Today2pm=
    UTCTODAY() & " " & TIME(14,0,0)

-- Provides the current time so we can check if it is before or after 2pm.
VAR Currenttime= UTCNOW()

--Checks to see whether the current time is before or after 2pm.
VAR TimeDiff=
    Currenttime-Today2pm

--Checks whether the daily refresh has happened AND that the time is after 2pm.  Only goes to a value of 1 if both these conditions are met.  This enables us to trigger the report distribution only if the data is updated and it's after 2pm.  The signficance of 2pm is that it gives us time to review the report for quality before it is distributed.
VAR Result =
    IF(
        AND(
            LastRefreshDate=TODAY(),TimeDiff>0
        ),
            1,
            0
    )

Return Result
This DAX does two things:
- Checks that the dataset was refreshed today – Variables LastRefreshDate and TodayvsLastRefreshDate.
- Checks that the time is > 2pm UK time (9am EST) – Variables Today2pm, Currenttime. This second step is included simply to allow some report quality assurance time. The data should be refreshed by 11am on most days, and this allows 3 hours to take a look at the report and make sure our senior leaders will get what they expected.
Variable Result checks that both these conditions are true.
Note: I could have combined these variables and made the DAX statement much shorter. I wanted to make it very easy to understand and so broke it down in this way. (Happy to take suggestions for improvement!!).
Finally, I put this measure into a card visual…

Solution in Depth – 3/5
Publish to the Power BI Service
This new report with the measure is then published to the Power BI service. I’m assuming readers of this post already know how to do this, but please reach out if you need help!).
The outcome of this step is that whenever the underlying dataset for this simple report is refreshed, this measure will either show a 1 (i.e. refreshed today and > 2pm) or a 0 (either not yet refreshed today or < 2pm).
The next step is to set up the scheduled refresh. To do this, you click on the scheduled refresh icon in the Power BI service:

I was disappointed when I reached this step because the Power BI service gave me the following error message. This is because we are using the Custom Connector.

The workaround for this is to use the Power BI Gateway and add the Custom Connector to the gateway. I’m going to write in this blog as though the reader doesn’t have access to a Standard Gateway and provide instructions for the Personal Gateway. Clearly it is better to use the standard gateway if you can though – because otherwise you need to keep the personal gateway running all the time.
Here is a link about the gateway and the difference between standard and personal. You can download the software for this from here.
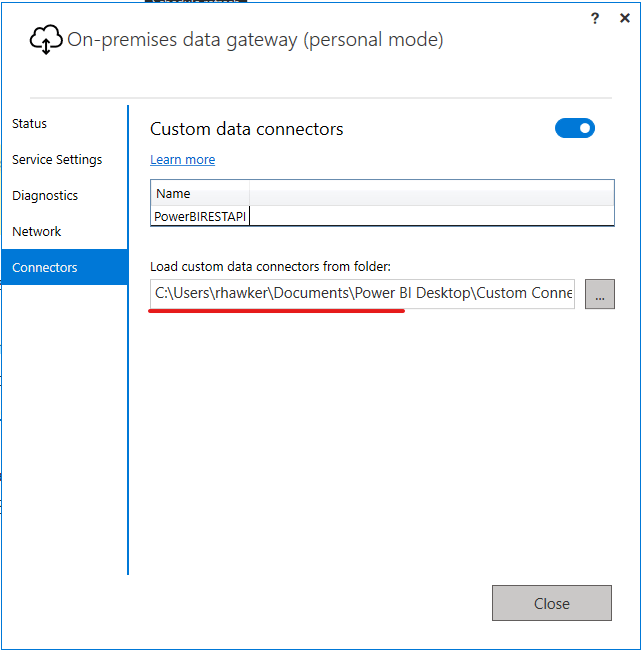
Once the software has been downloaded and installed, you need to place the Custom Connector for the Power BI Rest API in the appropriate folder (creating the folder if necessary):
Once this has been done, then you can return to the dataset “scheduled refresh” settings and you will no longer see the error message. You can select the gateway and the refresh will work!

I scheduled 3 refreshes:
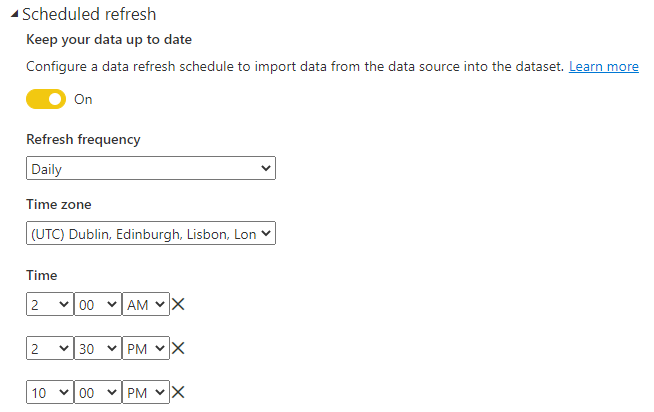
- 2AM – this is to deliberately re-set my measure result from earlier to a 0 (because the refresh will not have happened as early as 2am). You will see the reason for this later in the blog!
- 2.30PM – Usually by this time, the jobs have run successfully. This refresh usually will trigger a change in our measure from 0 to 1. As explained later in the blog, this will usually then trigger the report distribution by email.
- 10.00PM – this is the “failsafe” – if the refresh has not completed by this time, the team will have acted to try to resolve it and this refresh gives one further chance for the measure to change from 0 to 1 and for the reports to be distributed by email. If this doesn’t work, the reports will not be distributed on this day at all.
At this stage, you now have a report configured with a measure which will give a 1 when the conditions for the emailed report are ready for it to be sent out. What is still missing is a data alert which can be used as a trigger for the Power Automate job.
Solution in Depth – 4/5
Pin the visual to a dashboard – set up a data alert
In Power BI, the easiest way to set up a regular data alert when data reaches a certain status or threshold is to use a dashboard. You can also use the new(er!) Power BI Metrics capability for this, but as that is a premium feature, I decided to illustrate it using Dashboards.
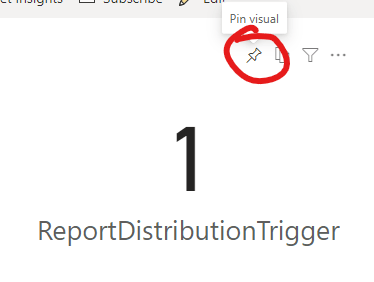
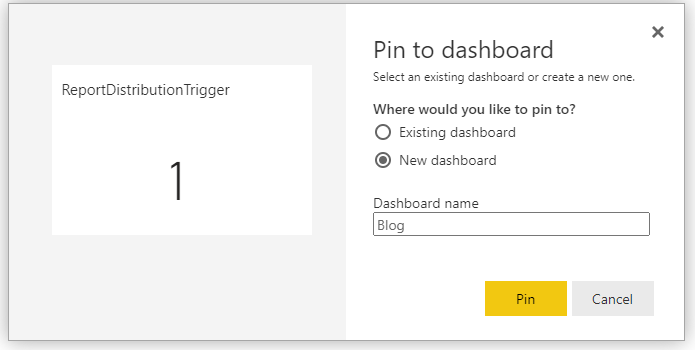
To do this is simple – you navigate to your report, hover over the card visual with the ReportDistributionTrigger measure in it and use the drawing pin icon to add it to a dashboard (either a new one or an existing one).
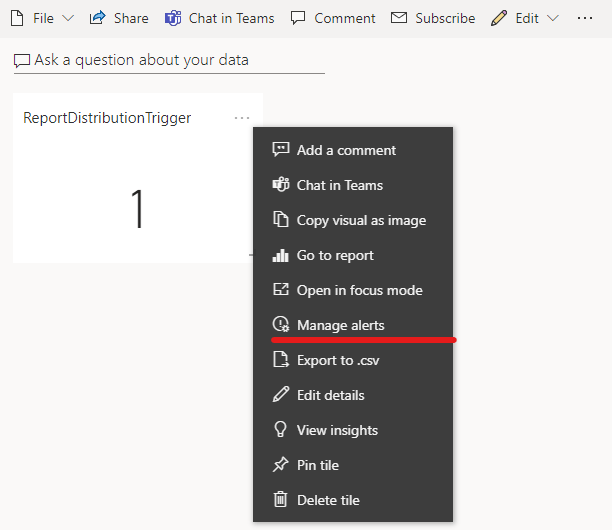
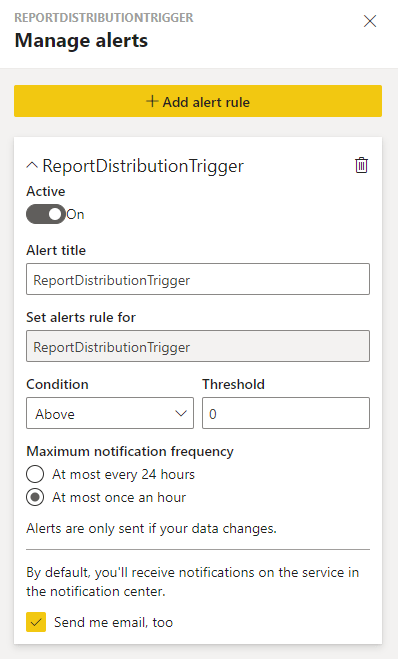
Open the dashboard and click the 3 dots at the top of the new card visual you see there. Select “manage alerts”:
Here are the settings I used for the alert. Sometimes we may need > 1 alert in the 24 hour period (e.g. if the alert is late on one day and early on another) so I selected “at most once per hour”. The threshold needs to be 0, because we only want to be alerted when the measure gives us a 1.
This is all we need to do in Power BI – the only remaining step is in Power Automate!
Solution in Depth – 5/5
Use the data alert to trigger the Power Automate job to distribute the report!
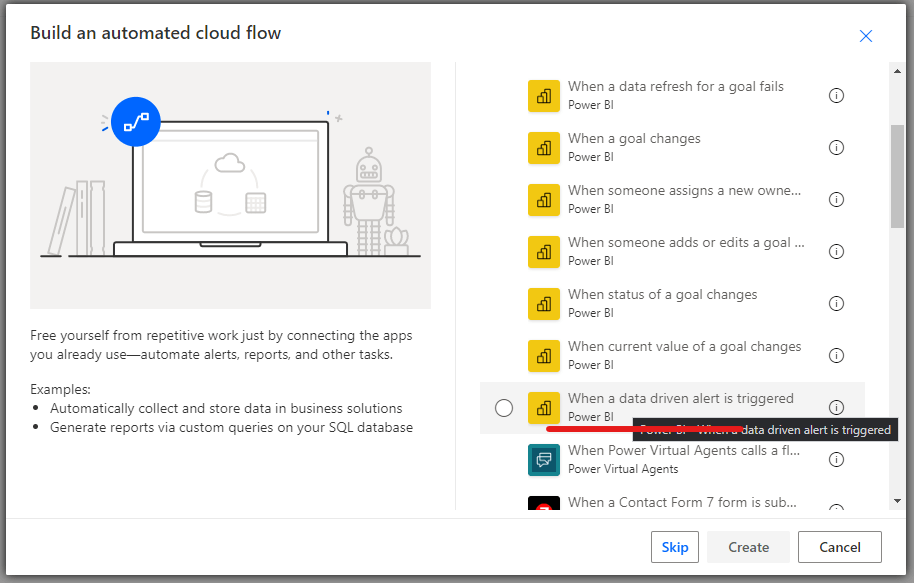
Nearly there! Firstly create a new Power Automate job (or amend an existing one) and select “Automated Cloud Flow”

Then type in Power BI into the search box, and select “When a data driven alert is triggered”:
In the new flow, you can then select the appropriate data alert from the dropdown list!

That’s all that we need – every time that our measure value changes from 0 to 1, our dashboard data alert will be triggered, and our Power Automate flow will also be triggered!
The full flow looks like this – it defines variables for file names, email recipients and roles for security. It then retrieves the report from Power BI (the Export to file for Power BI Reports” step and branches into an email distribution (via gmail) and a googledrive step to save an archive copy of the report.
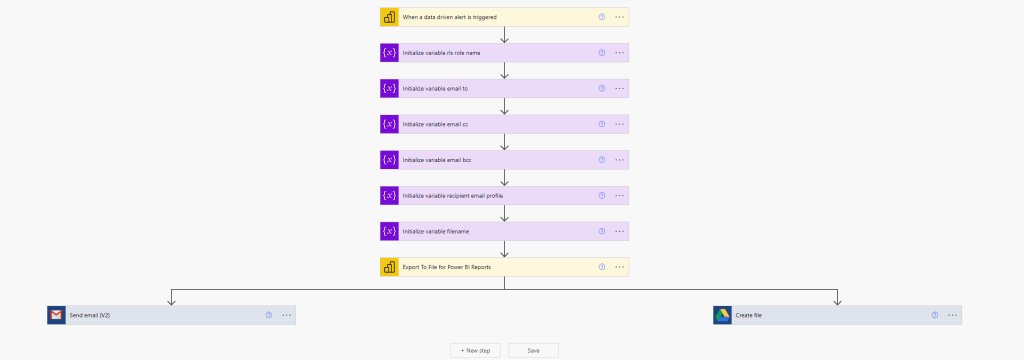
The important part is that it is now refresh driven rather than simply scheduled!
Users should never receive a report again where the data wasn’t refreshed.
I shouldn’t have to check whether the data has been refreshed prior to the reports going out and stop the jobs in time again.
Clearly if the data driven alert doesn’t trigger, I will need to investigate and make sure that underlying database issues are investigated and resolved, but I can do that without the 2pm time pressure.
Final Thoughts
It is much better to get the Power BI Gateway (Standard) working with the custom connector rather than the Personal Edition. The personal edition has to be running at all the refresh times and if it is on your laptop, then your laptop has to be on all the time. It also places reliance on one individual for these jobs which is never desirable. I only include the personal edition here so that readers can manage every step of the process themselves when testing this idea.
It feels like quite a convoluted solution to a simple problem – the desire to initiate a Power Automate job when a Power BI dataset refreshes. As discussed earlier, I will create a new idea for this and share the ID here – I will appreciate any votes I get from blog readers.
I am hopeful that this blog is helpful to at least a few people. As it is my first more technical blog, I would appreciate any thoughts, feedback, advice that readers may have.
Final credit once again to Miguel Escobar and Jordan Kline – I love your Custom Connector for the Power BI Rest API – I’ve used it over and over again and have spread the word to other colleagues – THANK YOU!

One thought on “Automatic Power BI Report Distribution After Dataset Refresh”