In my previous blog post I outlined a solution to only distribute a Power BI report via email/pdf AFTER a dataset refresh had successfully completed. Our Power Automate jobs had previously been triggered on a schedule – and I was always having to check that the data had been refreshed before the scheduled time and 20% of the time it hadn’t!
I published a solution to that problem which I still stand behind as a good solution. It works well and it doesn’t require any elevated security privileges in your organisation. Therefore, even if you work for a very highly controlled organisation where it is hard to get elevated access, you should still be able to use my previous post/solution.
However, after my post, my good friend Asgeir Gunnarsson (Owner of North Insights) got in contact and alerted me to an alternative solution. The alternative solution does require either elevated privileges or help from an Azure Administrator. It is however a cleaner solution with fewer “moving parts”. For example, my previous solution can be disrupted if someone:
- Deletes the Power BI report with the “ReportDistributionTrigger”.
- Deletes the dashboard containing the data alert, or the data alert itself.
- Removes the Custom Connector for the Power BI Rest API from the Power BI Gateway.
In contrast, the alternative solution really has only two moving parts:
- A Service Principal in Azure
- Power Automate jobs
Solution Summary
For this solution, a scheduled Power Automate job calls the Power BI Rest API directly, retrieves the most recent successful refresh of the Power BI Dataset and checks whether the date of the refresh = today’s date. If the answer is yes, then the report distribution goes ahead.
Technically, this solution is delivered through the following steps
- Azure Portal Service Principal Creation Step 1: Create a new app registration.
- Azure Portal Service Principal Creation Step 2: Create a new group, assign the app registration to it and provide access to the App in Power BI.
- Power Automate Step 1: Create a call using the Service Principal to the Power BI Rest API and parse it to get the “End Time” of the refresh.
- Power Automate Step 2: Create a control to check that the latest refresh date = Today
Solution in Depth – 1/4
Create a new app registration
For this step, I followed the guidance from the amazing “Guy in a Cube” team (Adam Saxton and Patrick LeBlanc. Specifically, this video outlines step by step how to create the app registration and the new group. I’d recommend using the video, but just in case people prefer a step by step guide here, here we go!
- Login to the Azure Portal (you probably need an Azure Administrator role on your account to access this) and find “App Registrations”:

- In App Registrations, select “new registration” and give it a name. I called mine “Power BI API Calls”. I selected the “Single Tenant” option, but it might be appropriate to choose a different option – it depends on your organisation specifically. Click “register” when you are done.
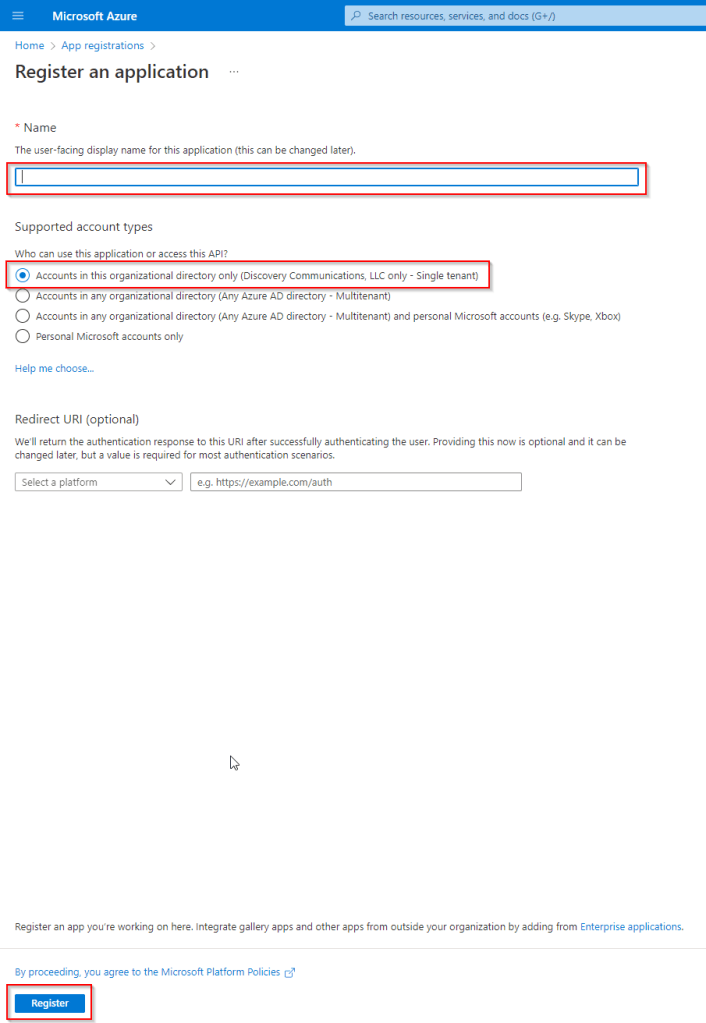
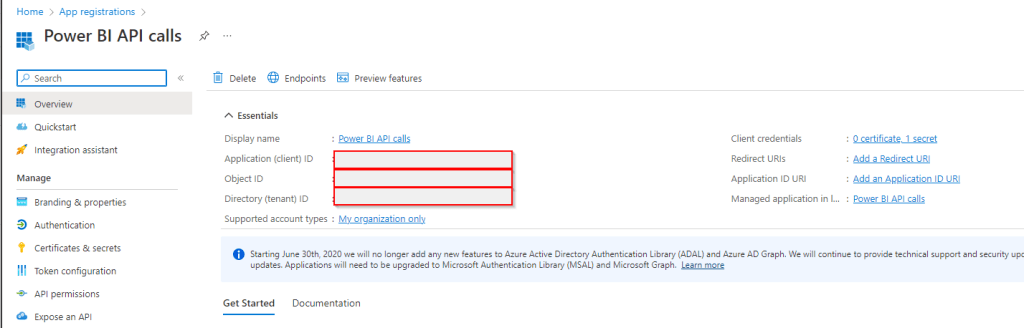
- On the next page, it is important to capture and store the following details
- The Application (client) ID (this is the unique identifier for this application and gets used later as a “user ID” for our connection to the API from Power Automate.
- The Directory (tenant) ID (this is the unique identifier for your organisation’s Microsoft tenant).
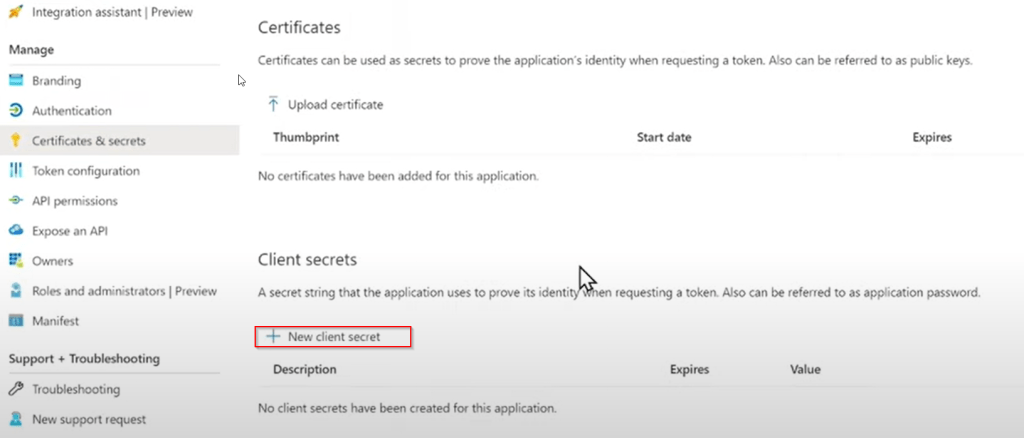
- The next step is to navigate to “certificates and secrets” and select “new client secret”. It is better to create a certificate at this point if you can – ask your Azure Portal Admin to help. It is critical to write down the secret. This will be the password that is used by Power Automate to connect to the API later.
- (Note: I took this screenshot directly from the Guy In a Cube Video because my app has a secret already so looks different – credit to Adam/Patrick).
Solution in Depth – 2/4
Create a new group, assign the app registration to it and provide access to the App in Power BI.
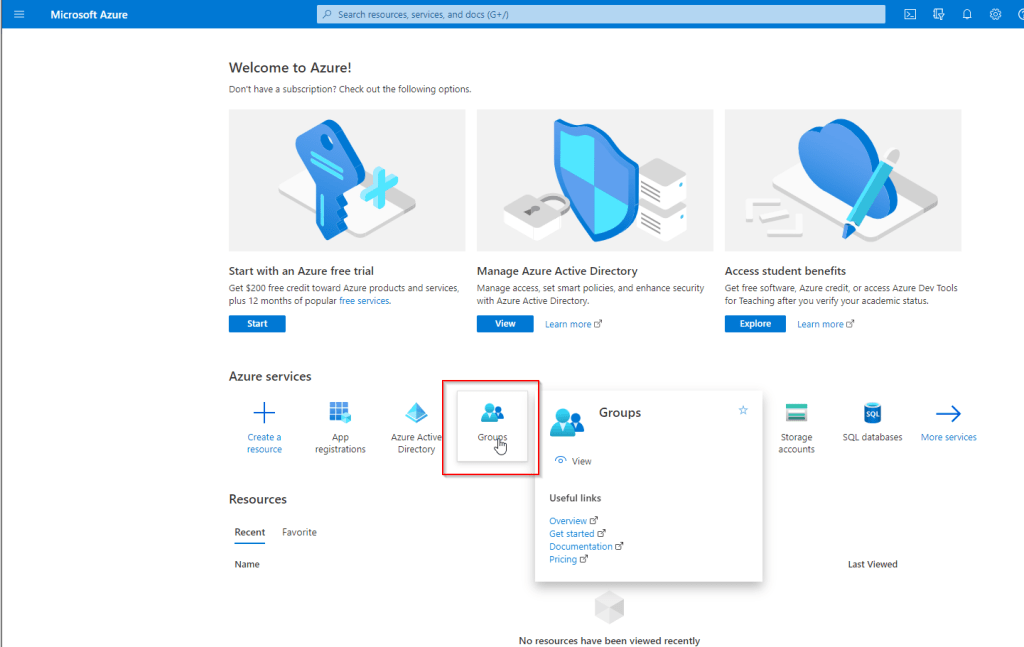
- The next step is to create a group in Azure. Navigate back to the Azure Portal home page and find the Groups icon. If you can’t see the groups icon, you can search for it in the search bar at the top
- In the groups dialogue, you select “new group” and complete the details as follows:

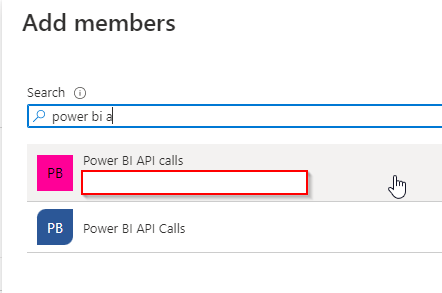
- Click the “Members” option on the left hand side and add your app registration to the group.
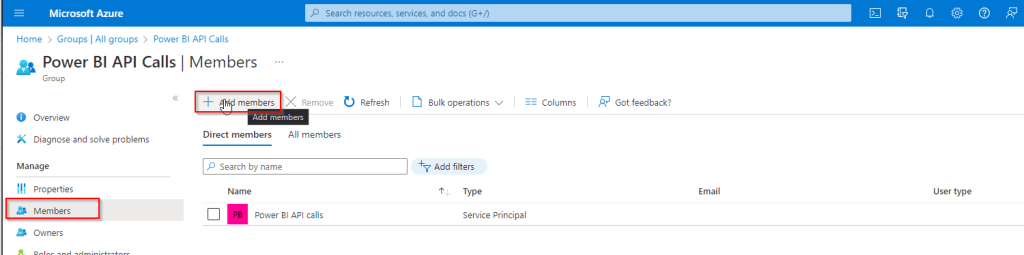
- To check it is the app registration, you can check the Application (client) ID (under the red bordered rectangle in my image below) against the one you recorded when creating the app registration.
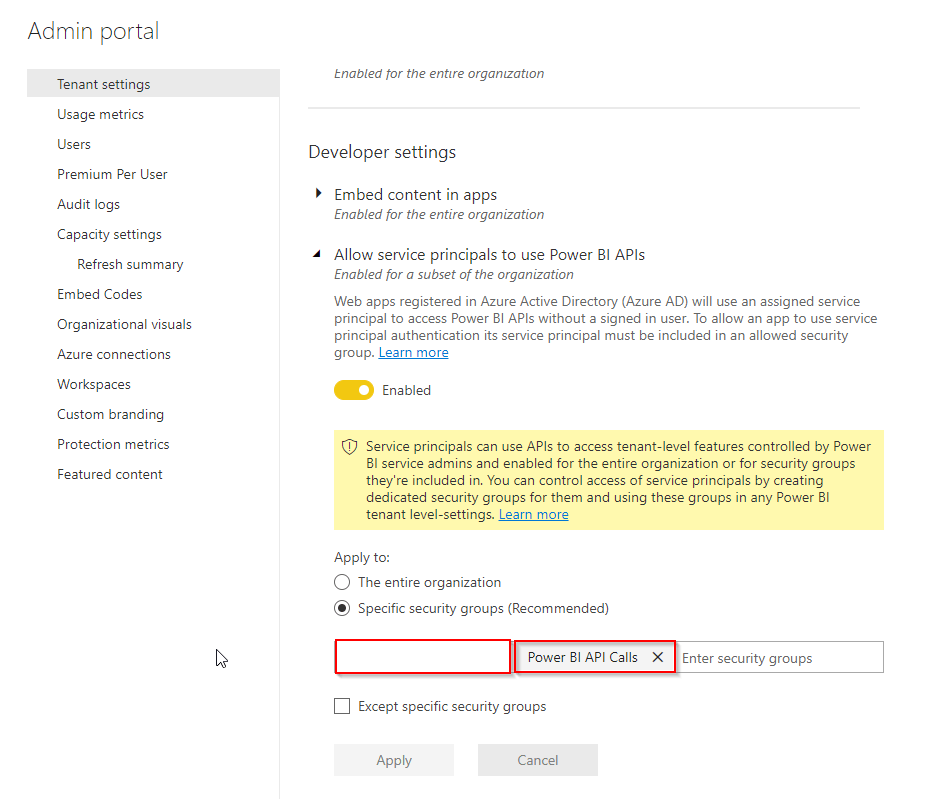
- Next in Power BI, a Power BI Admin needs to go to the Power BI Admin Portal and select “Tenant Settings”. Under the “Developer” section of these settings, the Admin can add the new security group to the setting “Allow Service Principals to use Power BI APIs and click “apply”:
- Next in Power BI, navigate to the Workspace which contains the Dataset which you want to check the refresh status of before your email report distribution goes out. Select the “Access” option.
- Search for the Group that was just created. You can identify the group both by its name, but also by the fact that it does not have an “Application (client) ID”. If you see the ID below the name, then this is the app registration rather than the Group.
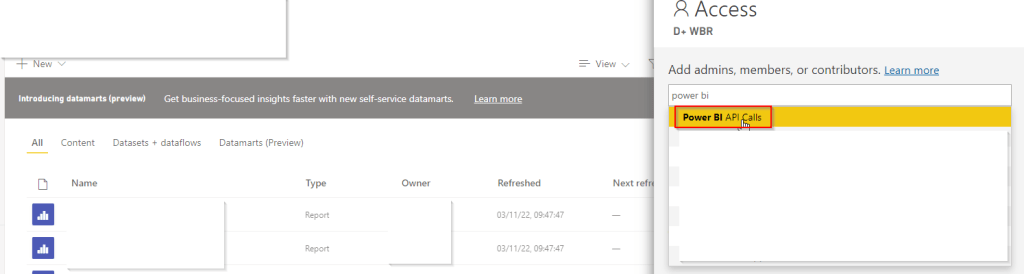
- Make sure to give the group “Admin” access to the workspace.
Solution in Depth – 3/4
Create a call from Power Automate to the Power BI Rest API using the Service Principal
- It’s time to head to Power Automate and start creating our flow! One caveat – I am a Power BI expert but I’m less experienced with Power Automate. I took over ownership Power Automate flows already created by another member of our team and have learned enough to manage. There will probably be better ways of doing some of the things in the instructions below and I may update the blog later for any feedback that I receive.
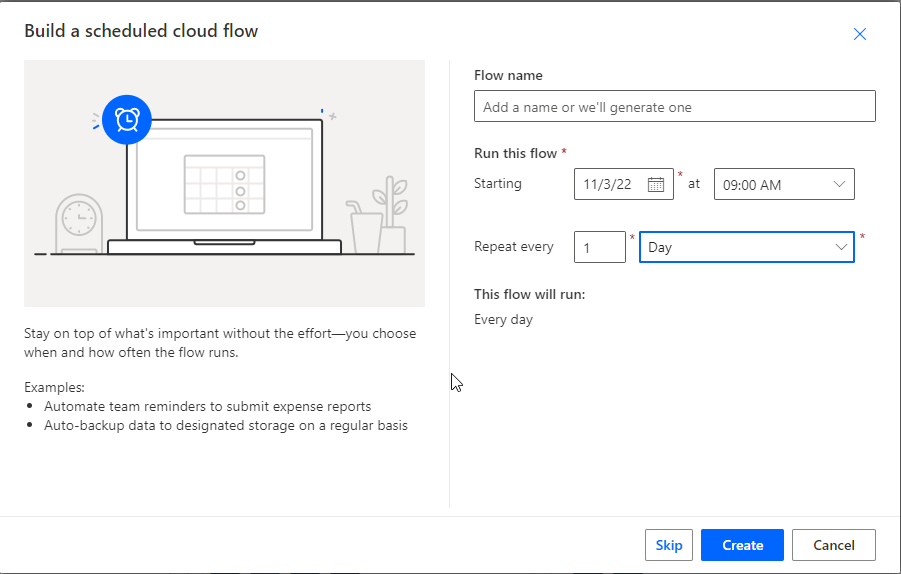
- In Power Automate, select “Create” and choose “Scheduled Cloud Flow”. Give the flow a name and select a time and date for it to start. For my flow, I chose for it to start tomorrow at 9am and repeat every 1 day. Don’t worry about getting this perfect – you can change this later.
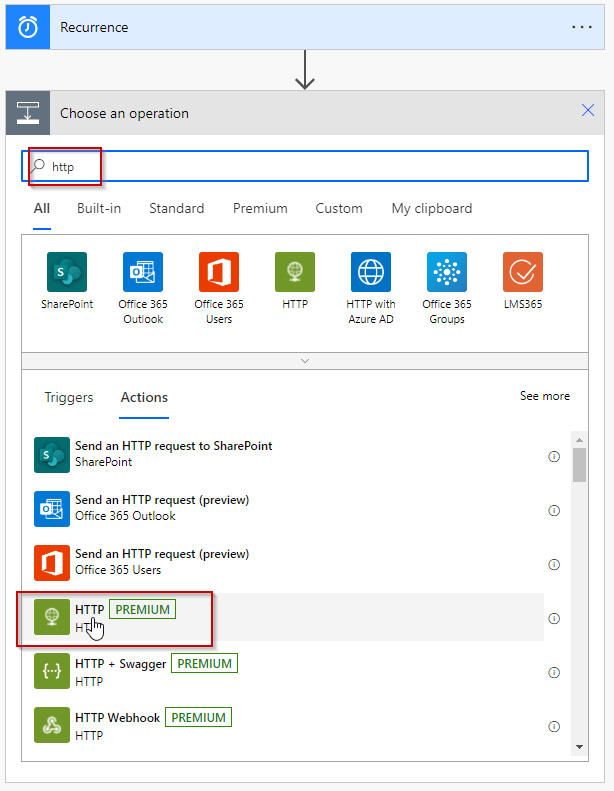
- Then you will see your flow with it’s “recurrence” step that you just defined, and you can click “+New Step”.

- In the new dialogue which appears, search for “HTTP”. (Note: This is a “premium” connector and you may need to check that it is included in your Power Automate license).
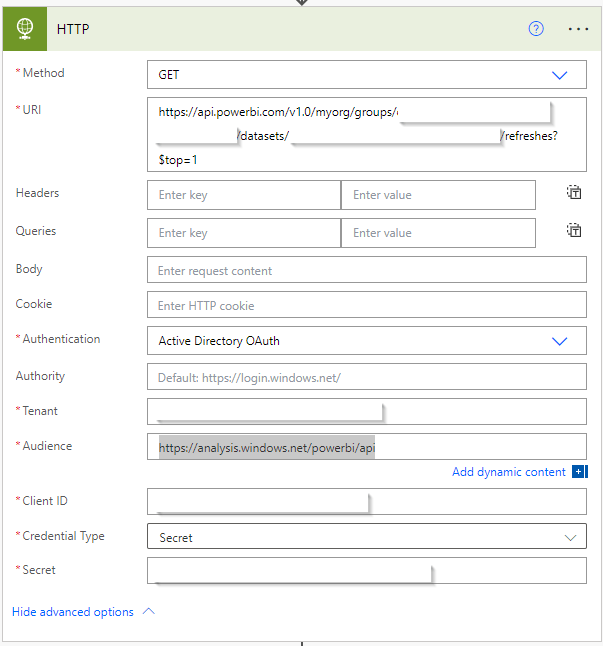
- Expand the “Advanced Options” and provide the following information:
- The Method: We are “getting data” from the Power BI Refresh History, so this should be “GET”
- The URL: This should be: https://api.powerbi.com/v1.0/myorg/groups/<WORKSPACE ID>/datasets/<DATASET ID>/refreshes?$top=1. This the critical part, so here are a two things to bear in mind:
- You need to replace the <WORKSPACE ID> and <DATASET ID> with the appropriate IDs from your Power BI tenant. For instructions on how to find the IDs you need, please see my other post – under the “Solution in Depth – 1/5- Get the dataset refresh history to check the dataset has been refreshed” heading.
- The “?$top=1” part makes sure that only the most recenty dataset refresh is returned. This is what we want in this case, but there might be other use cases where you need something different. This Microsoft Documentation will help if you want to vary the data which is returned.
- Authentication: You need to select “Active Directory OAuth”.
- Tenant: This is the tenant ID that we previously captured when registering the App.
- Audience: This is the following value: https://analysis.windows.net/powerbi/api
- Client ID: This is the Application (client) ID from the app registration page. This is effectively the user ID to be able to use the API.
- Credential Type: When you registered the app, if you chose to create a secret, select secret – otherwise if you chose to use a certificate, select that option.
- Secret: Assuming you selected “secret” in credential type, you need to enter the secret you wrote down during the app registration. This is the password to be able to use the API.
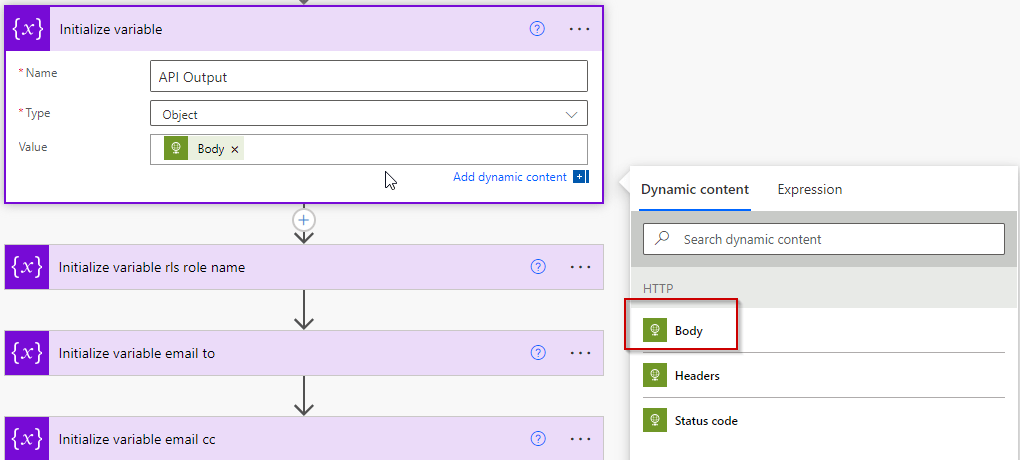
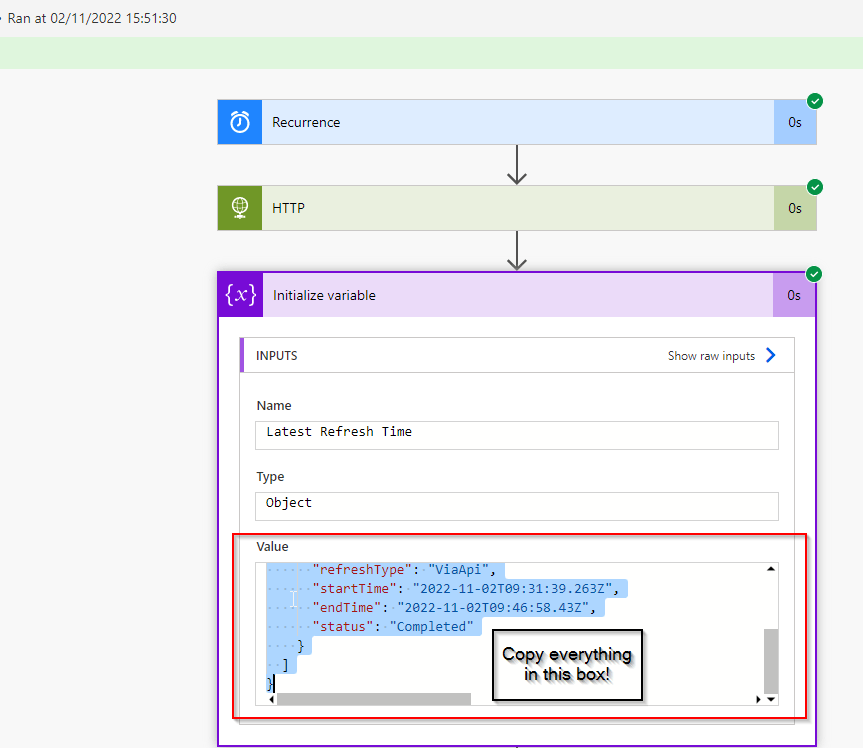
- Next, we create another new step. This is going to be using the “Initialize variable” action. Search for this in the “new step” dialogue, and enter the following details (you can put whatever name you choose).
- In the value field, when you click it, you will be allowed to select “dynamic content” – i.e. content which has been received by Power Automate from the previous step(s) in the flow. You can select “Body”. This will store in the variable all the data that the HTTP step returned from the Power BI API – including the start time and end time of the last data refresh:
- The next step is to save the flow and run it. This might seem strange because it is – incomplete, but all will become clear!
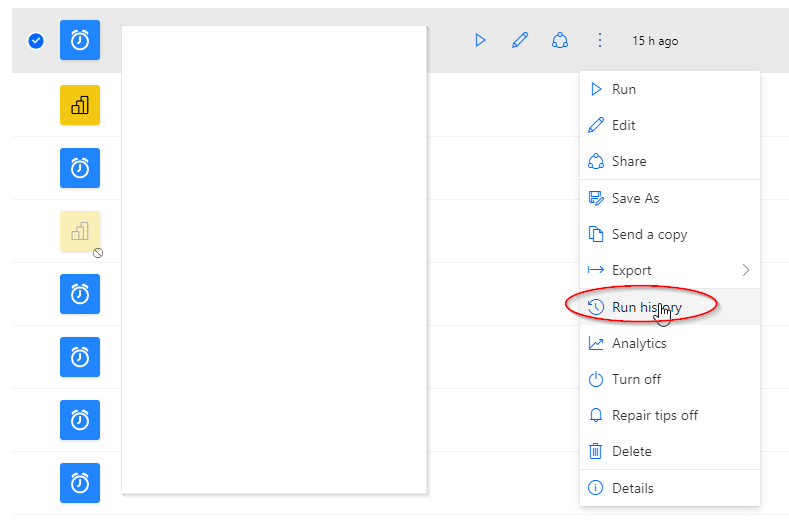
- To run the flow, find it in your Cloud Flows (or Shared Flows if you shared with someone else) and click the run button (circled below):

- Then go back to the “My Flows” view again and view the “Run History”. Under the variable, you will be able to find the data that the API returned in JSON format. Copy it to the clipboard and be ready to paste it in a later step
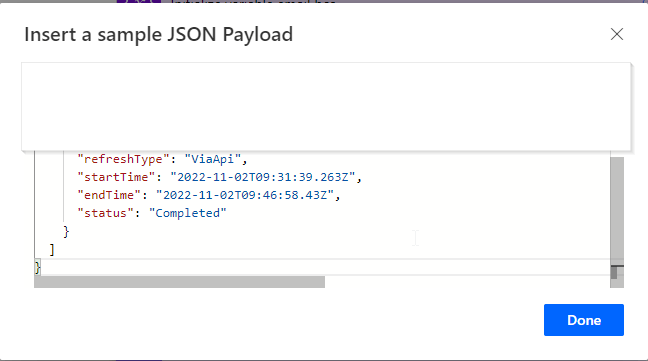
- The next step is to go back to edit your Flow again and add a new step with the action “Parse JSON”. The output from the Power BI Rest API is in a JSON format. We need the “Parse JSON” to break it down into the individual fields within that JSON – for example, ID, Refresh Type, Start Time, End Time. We will need End Time later!
- To do this, you use the “generate from sample” option in the Parse JSON step. Once you click the button a box will appear titled “Insert a sample JSON Payload”. In that box, you paste the JSON we got from the step above and click “Done”:
Now you have got this far – your “Parse JSON” step will have broken down all the elements of the API data into the constituent fields. One of the outputs of this step is “EndTime” which you can use in the next step to check if the refresh happened today.
Credit: I learned how to use the Parse JSON step by looking at this Encodian blog by Jay Goodison. Many thanks to the authors!
Solution in Depth – 4/4
Power Automate – Create a control to check that the latest refresh date = Today
In this section, we will add a step to our flow which takes the “End Time” of the last refresh from the Parse JSON step, and converts it into a date only (the value is a date-time). We will then compare this to today’s date. If the End Time = Today, then we will send an email containing our report. If the end time <> today, then we will send an email stating that the refresh didn’t happen in time – i.e. that the report is not going out unless we intervene.
Here are the steps to do this:
- Open the flow again and click “+New Step”. This time we want the operation “Control” and “Apply to Each”. When you click on the blank cell (Select an output from previous steps”, you should see a list of the individual data items from the Parse JSON step – including “endTime”.
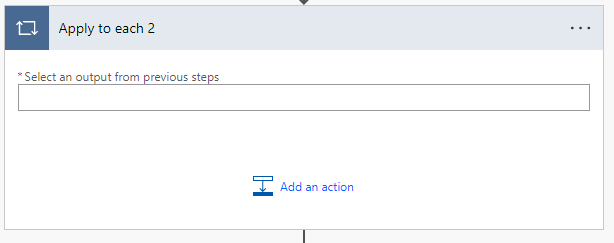
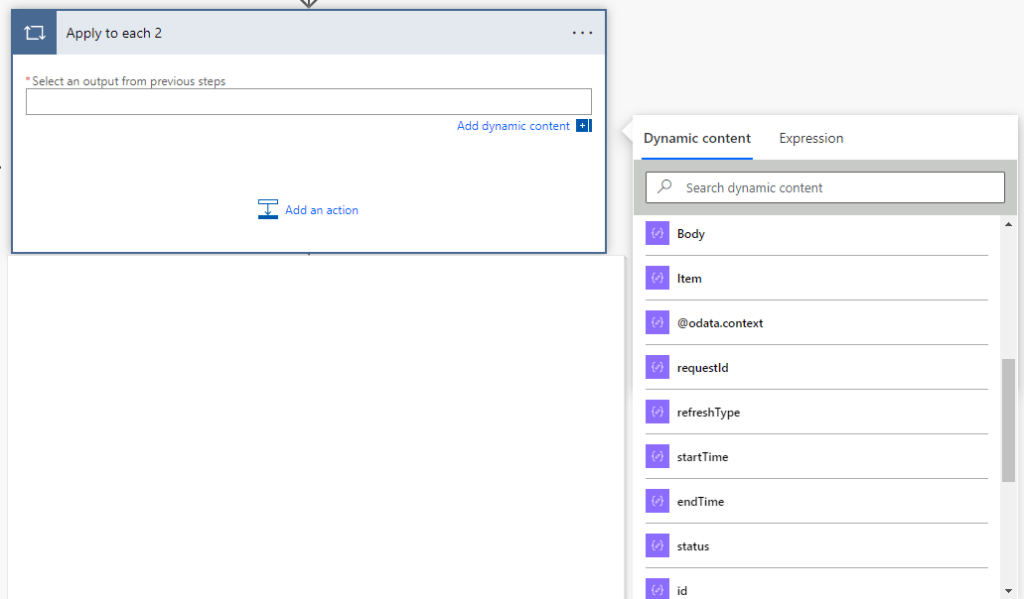
- Select “endTime” and it will convert to “value” in the step. Then click “add an action” and choose “condition”.
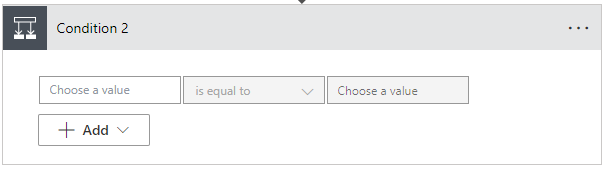
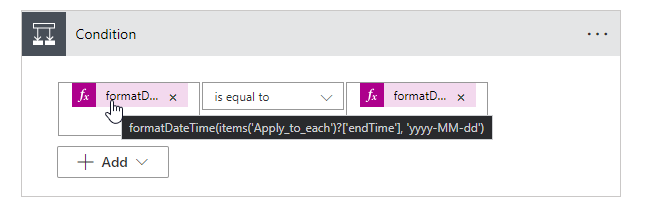
- Click in the first cell, and click “expression”. Next to the “Fx” icon, paste in the following expression:
formatDateTime(items(‘Apply_to_each’)?[‘endTime’], ‘yyyy-MM-dd’)

- Then change the comparison operator to “is equal to”.
- Click in the second cell, and next to the “Fx” icon, paste in the following expression: formatDateTime(utcNow(), ‘yyyy-MM-dd’)
- These expressions format the “endTime” variable into a Date with the format of “yyyy-mm-dd” and compare it to today’s date in this same format. It should now look like this:
Credit: I got the expression for this condition from Debajit Dutta’s blog post. Many thanks for a very clear explanation Debajit!
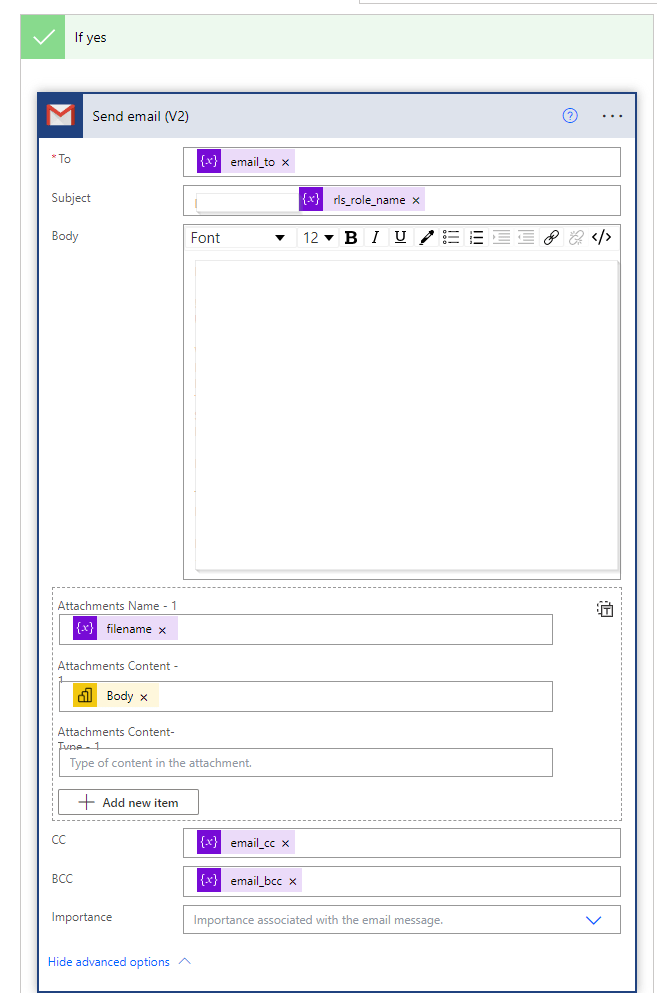
- The condition action provides a “yes” and a “no” path. In the “Yes” path, you can add a “send email” action. I’m using “gmail”, but you can also use other email types and clients.
- It is a good idea to set up an email send in the “no” part of the action because this enables you to be aware when 9am has been reached but the refresh did NOT happen. You can then resolve the issue with the refresh and return to the flow and manually re-trigger it.
- This blog does not intend to cover the set up of the email send itself, but here are the key points:
- You can define variables in the flow which give you the list of email addresses / groups you want to send the email to. You can then re-use these in the email send. For example, you see “email_to”, “email_cc” and “email_bcc” in this email send. These were all defined earlier in the flow using “initialize variable”.
- You can also define variables for the name of the file which will be attached to the email send and also for any row level security roles which need to define who can see which rows.
- You use the “Export to File for Power BI reports” action to define which report should be sent. This Microsoft Documentation provides a great guide to doing this.
Final Thoughts
I hope that this blog post and the previous one provide two good options to solve the stated problem and completely automate this kind of report distribution. I would love to hear feedback and which option has suited you best!
Once again, a massive thank you to Asgeir Gunnarsson. Asgeir provided the screenshot of the HTTP step and directed me toward the “Parse JSON” step so this is very much also his work.
